
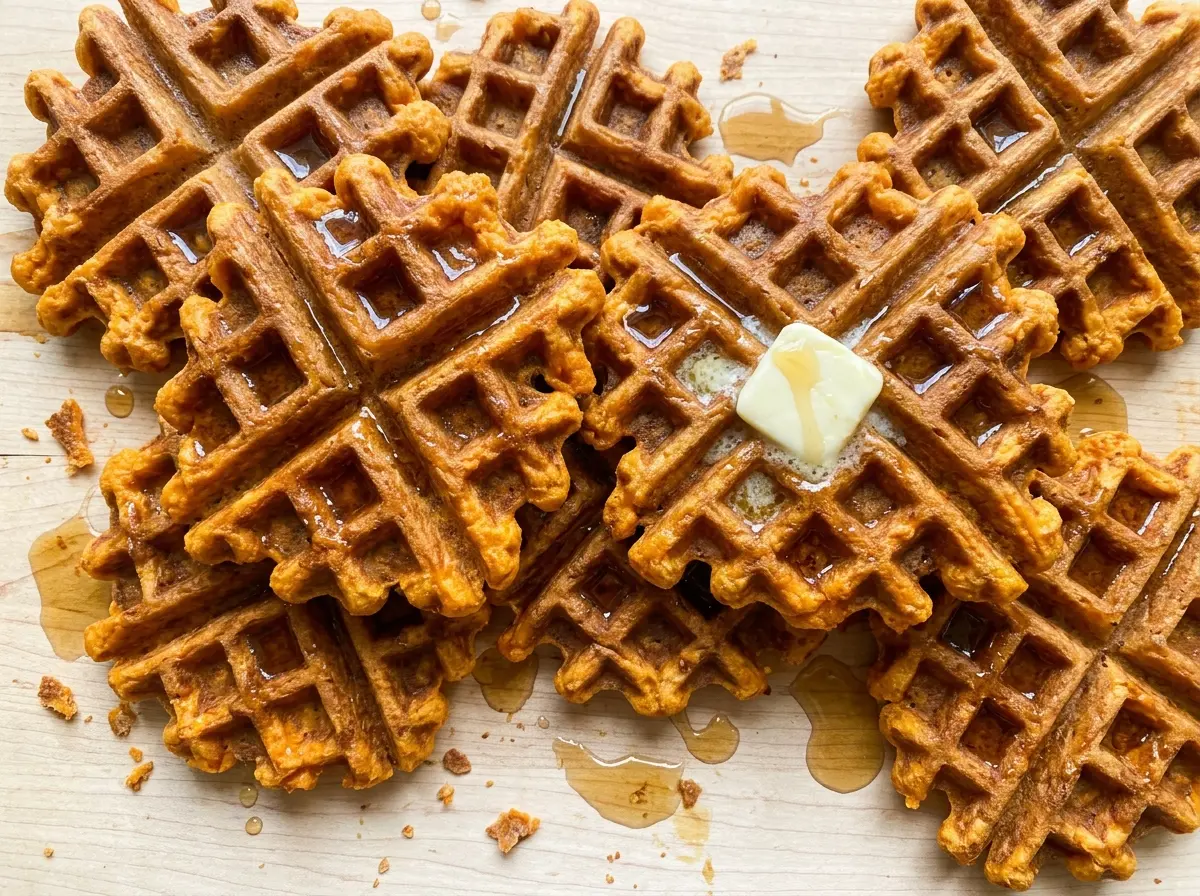
The first waffle tells me whether the iron is hot enough: when the lid lifts, I’m looking for golden edges and a crisp surface, not a pale, soft waffle that needs another minute. The sweet potato gives these waffles a fuller, more tender center than a plain batch, and the cinnamon makes the kitchen smell warm without turning breakfast into dessert. This recipe makes six servings, so there’s enough batter to cook in batches without rushing the first waffle.
I microwave the sweet potato until it’s very soft, then mash it smooth before measuring. That gives the batter an even texture and keeps little firm bits from showing up in the finished waffles. The wet ingredients whisk together in a separate bowl, which makes it easy to distribute the sweet potato before it meets the flour. With crisp edges and a soft middle, these sweet potato waffles are worth taking one batch at a time.
Kitchen Note
Don’t stop microwaving when the outside just feels soft; the potato should be very soft all the way through before you peel it. Mash until smooth, then measure the puree so the batter gets the right amount of sweet potato.
Save these sweet potato waffles for crisp edges, a soft center, and a cozy cinnamon note in every batch.
Why These Waffles Taste Like Sweet Potato, Not Dessert
Sweet potato already has a gentle sweetness and a distinct earthy flavor, so the batter doesn’t need to be pushed toward cake. The granulated sugar plays a quieter role: it balances the potato and helps the surface turn golden as the waffles cook. Cinnamon and vanilla round out the flavor, but neither should cover up the sweet potato itself.
That balance is what makes these waffles work for breakfast rather than feeling like a slice of spiced cake pressed into a waffle iron. Adding extra sugar changes how quickly the outside browns, and piling on more spice can make the potato harder to taste. I keep the flavor simple and let the cooked sweet potato be the reason each bite tastes different from a standard waffle. The result is gently sweet, fragrant, and easy to pair with whatever you usually like on waffles.
What the Sweet Potato and Butter Bring to the Batter

- Sweet potato — A medium potato gives the batter its color, moisture, and mellow sweetness. Choose one that feels firm and has unbroken skin; there’s no need to seek out a specialty variety. Plain canned sweet potato puree can stand in if it’s unsweetened and smooth, but avoid sweet potato pie filling, which has added sweeteners and spices.
- All-purpose flour — It gives the waffles enough structure to hold the moist puree without making the crumb heavy. A standard store-brand flour works well. For a gluten-free version, use a measure-for-measure baking blend that includes a binder; the waffles may be a little more tender and less crisp.
- Baking powder — This is the batter’s leavener, so freshness matters more than brand. If yours has been open for a long time, check that it still bubbles when stirred into hot water before relying on it for lift.
- Eggs and milk — The eggs help the batter hold together, while milk loosens the mashed sweet potato so it can mix through the flour. For a dairy-free batch, use unsweetened oat or soy milk in the same volume as the milk; the flavor will be a little less creamy.
- Unsalted butter — Melted butter adds richness and helps the waffle interior stay tender. Let it cool before whisking it with the eggs so it doesn’t make the mixture unpleasantly warm. A melted plant-based butter can replace it for a dairy-free version, though the buttery flavor will be milder.
- Cinnamon and vanilla — Cinnamon gives the potato a warm, familiar note, and vanilla softens the edges of its earthy flavor. Use fresh, aromatic spices if yours have been sitting open for years; an inexpensive bottle is fine when it still smells fragrant.
Mixing and Cooking Sweet Potato Waffles Without Losing Their Crisp Edges
Cook the Potato Until It Gives Easily
Pierce the sweet potato several times with a fork and microwave it on HIGH for 6 to 10 minutes, turning it halfway through. It should be very soft, not merely warm or yielding at the surface. Let it cool enough to handle, peel it, and mash until smooth. Measure the mashed sweet potato before moving on so the batter stays balanced.
Whisk the Dry and Wet Mixtures Separately
In a large bowl, whisk together the flour, sugar, baking powder, cinnamon, and salt. In a second bowl, whisk the eggs, milk, mashed sweet potato, melted and cooled butter, and vanilla until combined. Separate bowls help the sweet potato disperse evenly before it meets the flour. If the mash is streaky in the wet mixture, keep whisking until those larger patches disappear.
Stir Just Until the Flour Disappears
Pour the wet mixture into the flour mixture and stir only until no dry pockets remain. A few small lumps are fine; chasing every lump with extra stirring can make waffles tougher. Let the batter rest for 5 minutes while the waffle iron heats. That short pause gives the flour a chance to absorb moisture without turning the batter into a smooth paste.
Cook Until Golden and Crisp
Preheat the waffle iron according to its manufacturer’s directions, then lightly coat it with nonstick cooking spray. Add the amount of batter recommended for your iron and cook each waffle for 3 to 5 minutes, until golden brown and crisp. Opening the iron before the surface has set can tear the waffle or leave it pale, so use the color and crispness as your cue. Reapply cooking spray between batches as needed.
Three Simple Ways to Adapt the Waffle Batter
Make the Waffles Dairy-Free
Replace the milk with unsweetened oat or soy milk in the same volume, and use melted plant-based butter in place of the dairy butter. Soy milk keeps the batter relatively rich; oat milk makes the flavor a touch sweeter and softer.
Use a Measure-for-Measure Gluten-Free Blend
Swap the all-purpose flour for a gluten-free baking blend meant to replace wheat flour cup-for-cup, ideally one that already contains a binder. The waffles will still cook in the iron, but expect a more delicate crumb and slightly less crisp edges than the original.
Give the Cinnamon a Ginger Note
Replace the ground cinnamon with the same amount of pumpkin pie spice for a more layered, gently spiced waffle. The sweet potato stays in the foreground, but the finished batch tastes closer to a classic fall spice blend.
Storage and Reheating
- Refrigerator: Keep cooked waffles in an airtight container for 3 to 4 days. They’ll soften in storage, but reheating brings back some crispness.
- Freezer: Freeze cooled waffles in a single layer, then transfer them to a freezer-safe container with parchment between layers. They keep their quality for about 2 months.
- Reheating: Reheat in a toaster or in a 350°F oven until hot and crisp. Avoid stacking warm waffles, which traps steam and softens the edges.
Questions That Come Up When Making Sweet Potato Waffles
Sweet Potato Waffles
Ingredients
Equipment
Method
- Pierce the sweet potato several times with a fork and microwave on HIGH for 6 to 10 minutes, turning halfway through, until very soft.
- Let the sweet potato cool enough to handle, then peel and mash until smooth; measure 1 cup.
- Whisk the flour, sugar, baking powder, cinnamon, and salt in a large bowl.
- In a second bowl, whisk the eggs, milk, mashed sweet potato, melted butter, and vanilla until combined.
- Pour the wet mixture into the flour mixture and stir just until no dry pockets remain; a few small lumps are fine.
- Let the batter rest for 5 minutes while the waffle iron heats.
- Preheat a waffle iron according to its manufacturer’s directions and lightly coat it with nonstick cooking spray.
- Cook the batter in batches, using the amount recommended for your iron, for 3 to 5 minutes per waffle, until golden brown and crisp; reapply spray between batches as needed.