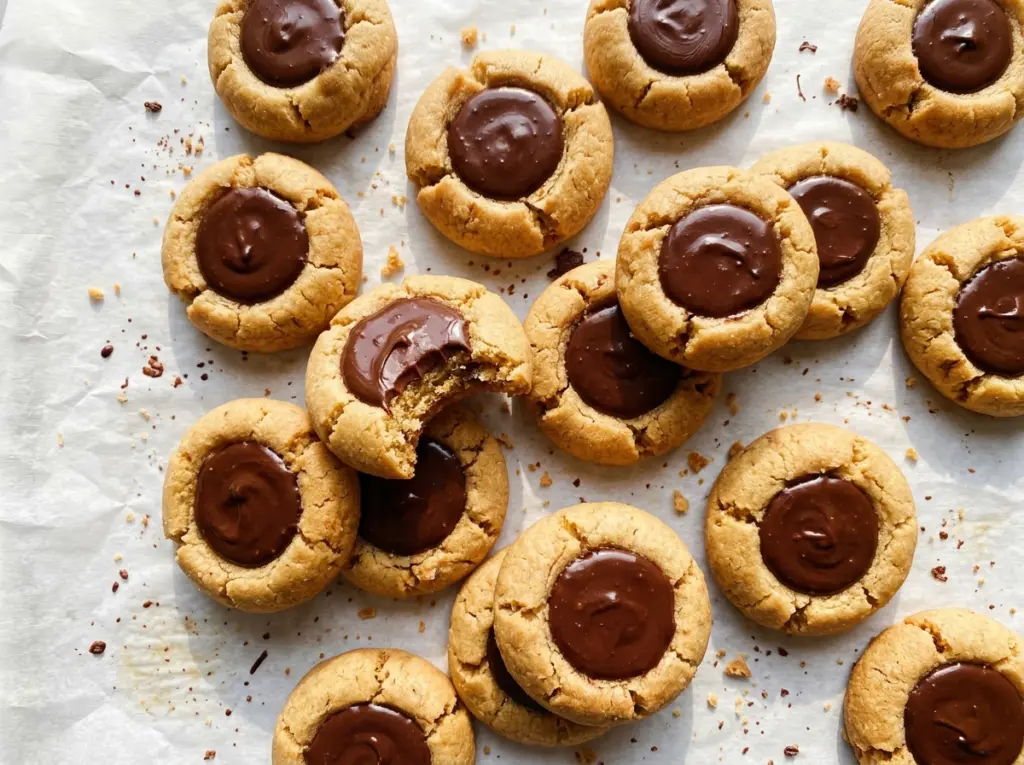
The first press into cocoa cookie dough feels promising, but the indentations can puff in the oven and leave almost no room for chocolate. These chocolate thumbprint cookies solve that with a quick second press while the cookies are still warm. The edges hold their shape, and each center gets a neat pool of smooth ganache.
The dough is rich with butter, but an egg yolk keeps it tender without adding the extra moisture of a whole egg. Chilling it for 30 minutes makes the portions easier to roll and helps the cookies keep their shape. I fill them only after they’ve cooled completely, so the chocolate stays where it belongs instead of melting into the cookie. You get a soft cocoa bite, a delicate edge, and a glossy center that sets just enough to handle.
Kitchen Note
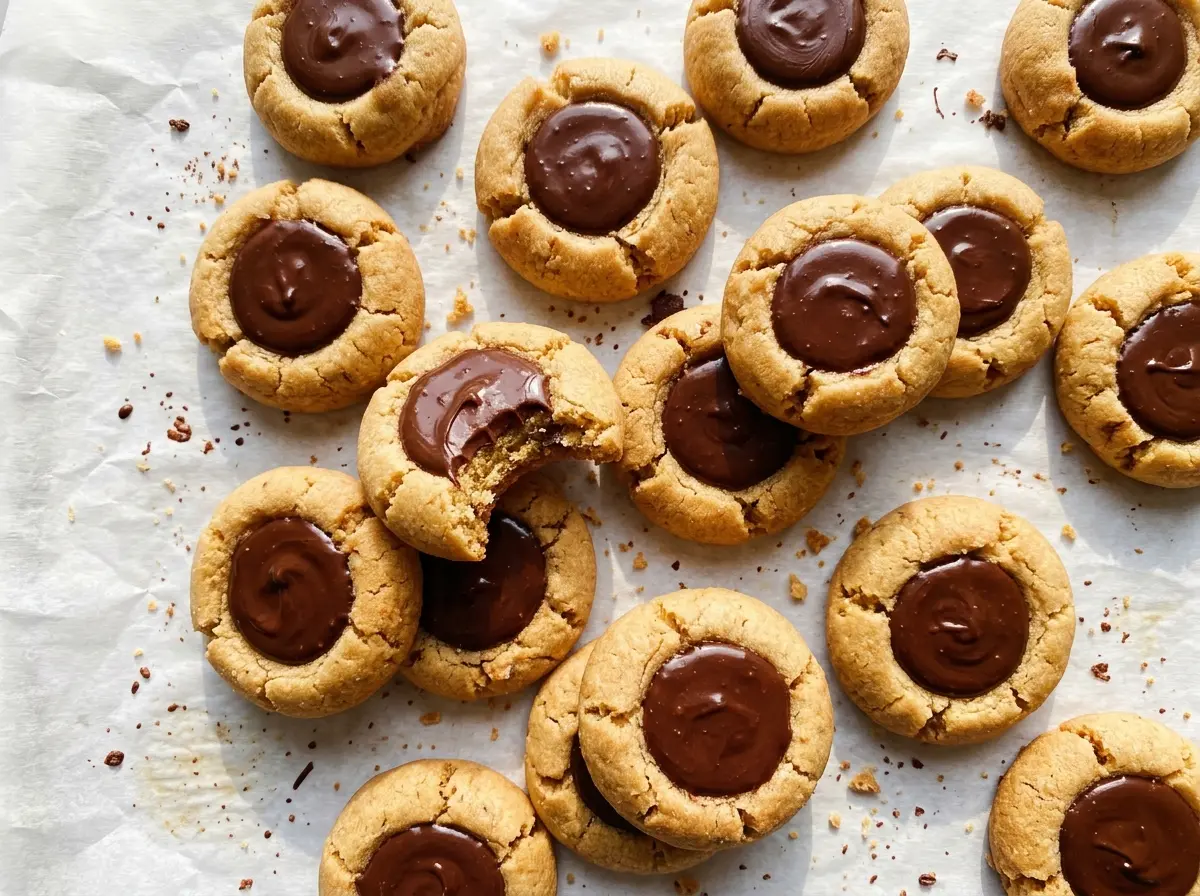
Let the ganache cool until it’s thick but still spoonable before filling the cookies. If it’s warm and runny, it can spread over the tops instead of settling neatly into the centers.
Save these chocolate thumbprint cookies for a bake with tender cocoa centers and smooth semisweet ganache.
Why Cocoa Thumbprints Need a Second Press After Baking
Cocoa dough is soft and buttery, so the indentation you make before baking won’t always stay as deep as you want. The cookies puff slightly as they bake, and a shallow center can disappear under the filling. Pressing again with the back of a teaspoon while the cookies are warm restores the well without cracking the edges.
Shape each portion into a smooth ball, then press firmly enough to make a clear center with a sturdy rim around it. If the indentation is too shallow, you’ll have less room for ganache; if you press all the way through, the filling can leak onto the baking sheet. The second press gives you a chance to correct the shape after the dough has set at the edges. Aim for a noticeable well, not a hole, and keep the cookie’s outer edge intact.
These details matter more here than making every indentation identical. A little variation is fine as long as each center can hold its spoonful of filling. The warm cookies are easiest to reshape, so have the teaspoon ready when the sheets come out of the oven.
What Makes the Cookie Base Tender and the Filling Set Smoothly

- All-purpose flour — It gives the cookies enough structure to hold their thumbprints while keeping the crumb delicate. For a gluten-free version, use a measure-for-measure flour blend formulated for baking; the texture may be a little more crumbly.
- Unsweetened cocoa powder — This brings the deep chocolate flavor without adding sugar. Use plain unsweetened cocoa, not sweetened cocoa drink mix, which would change the sweetness and dry-ingredient balance.
- Unsalted butter — Softened butter creams smoothly with the sugar and helps make the dough tender. Let it soften until it gives slightly when pressed, but don’t use melted butter; melted butter won’t cream into the same light mixture.
- Egg yolk — The yolk binds the dough and adds richness. Keeping out the white limits extra moisture, which helps these cookies stay tender rather than turning cakey.
- Semisweet chocolate and heavy cream — Together they make a filling that’s rich but still spoonable. Finely chopping the chocolate helps it melt evenly when the hot cream is poured over it; heavy cream gives the ganache its smooth, thick texture.
- Vanilla extract — It rounds out the cocoa and butter without competing with the chocolate. Pure or imitation vanilla both work here, so use the one you keep on hand.
From Chilled Dough to Neat Ganache Centers
Cream the Butter and Build the Dough
Heat the oven to 350°F and line two 18×13-inch baking sheets with parchment paper. Whisk the flour, cocoa powder, and salt in a medium bowl so the cocoa is distributed before it meets the butter. In a large bowl, beat the softened butter and sugar with an electric mixer on medium speed for about 2 minutes, until creamy, then beat in the egg yolk and vanilla. Mix in the flour mixture on low just until combined; cover the dough and chill it for 30 minutes.
Roll and Indent Each Cookie
Divide the chilled dough into 24 portions, about 1 1/2 tablespoons each, and roll each portion into a ball. Arrange the balls 2 inches apart on the prepared sheets so they have room to spread. Press a deep indentation into the center of each with your thumb, keeping a rim of dough around it. If the dough sticks to your thumb, ease the pressure and press again rather than twisting the dough out of shape.
Bake Until the Edges Are Set
Bake for 11–13 minutes, switching the sheets between racks and rotating them front to back halfway through. The cookies are ready when the edges look set; the centers will still be soft. If baking has puffed the indentations, gently deepen them with the back of a teaspoon while the cookies are warm. Let them cool on the baking sheets for 5 minutes, then transfer them to a wire rack and cool completely.
Stir the Ganache Smooth and Fill
Put the finely chopped chocolate in a heatproof bowl. Heat the cream in a small saucepan over medium-low until steaming and just beginning to bubble at the edges, about 2–3 minutes, then pour it over the chocolate and leave it undisturbed for 2 minutes. Stir until smooth, then let the mixture cool for 5–10 minutes, until thick but spoonable. Spoon about 1 teaspoon into each cooled cookie and leave the filling to set for 30 minutes.
Three Small Changes for Different Chocolate Thumbprints
Make the Cookies Gluten-Free
Replace the all-purpose flour with the same amount of a measure-for-measure gluten-free baking blend. Choose a blend intended to replace wheat flour in cookies; the finished cookies may be slightly more delicate, so let them cool on the baking sheet before moving them.
Use Bittersweet Chocolate in the Filling
Swap the semisweet chocolate for the same amount of bittersweet chocolate. The ganache will taste darker and less sweet, while keeping the same smooth, spoonable texture when cooled.
Choose Dutch-Process Cocoa
Use Dutch-process cocoa in place of natural unsweetened cocoa for a rounder, less sharp chocolate taste. Because these cookies don’t rely on baking soda or baking powder for lift, the swap doesn’t require changing the rest of the dough.
Storage and Serving
- Refrigerator: Keep the filled cookies in an airtight container for up to 4 days. The ganache firms when cold, and the cookie softens slightly.
- Freezer: Freeze fully cooled, unfilled cookies in an airtight container with parchment between layers for up to 2 months. Thaw at room temperature, then make and add the filling.
- Serving: Let refrigerated cookies sit out briefly before serving so the centers aren’t as firm. Don’t microwave them; the ganache can turn runny before the cookie warms evenly.
Questions That Come Up When Baking Chocolate Thumbprints
Chocolate Thumbprint Cookies
Ingredients
Equipment
Method
- Heat the oven to 350°F and line two 18x13-inch baking sheets with parchment paper.
- Whisk the flour, cocoa powder, and salt together in a medium bowl.
- Beat the butter and sugar in a large bowl with an electric mixer on medium speed until creamy, about 2 minutes.
- Beat in the egg yolk and vanilla.
- Mix in the flour mixture on low speed just until combined.
- Cover and chill the dough for 30 minutes.
- Divide the dough into 24 portions, about 1 1/2 tablespoons each.
- Roll the portions into balls and arrange them 2 inches apart on the prepared sheets.
- Press a deep indentation into each ball with your thumb.
- Bake for 11–13 minutes, switching the sheets between racks and rotating them front to back halfway through, until the edges are set.
- Gently deepen the indentations with the back of a teaspoon if they have puffed.
- Cool the cookies on the baking sheets for 5 minutes.
- Transfer the cookies to a wire rack and cool completely.
- Put the chocolate in a heatproof bowl.
- Heat the cream in a small saucepan over medium-low heat until steaming and just beginning to bubble at the edges, about 2–3 minutes.
- Pour the cream over the chocolate and let stand for 2 minutes.
- Stir the chocolate mixture until smooth.
- Let it cool for 5–10 minutes, until thick but spoonable.
- Spoon about 1 teaspoon into each cookie.
- Let the filling set for 30 minutes.


