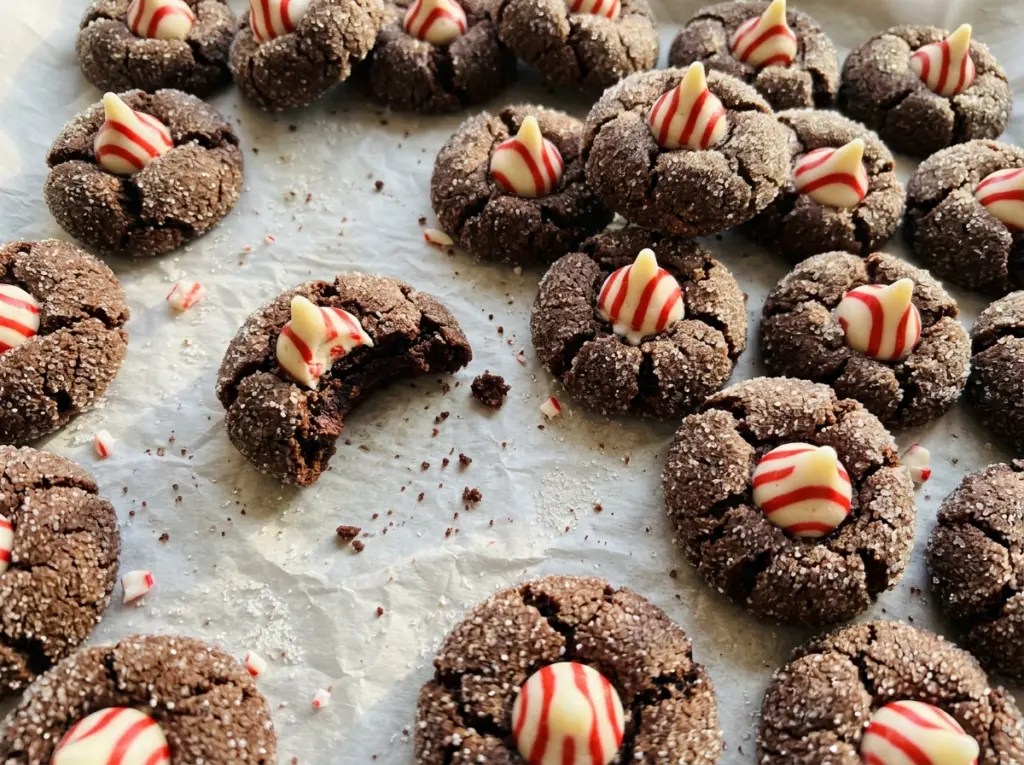
The cocoa tops come out matte, with the first little cracks showing around the edges. That’s the moment to pull them from the oven—not when they look deeply split or firm all the way through. These Chocolate Peppermint Blossoms bake into tender chocolate cookies with a sugar-coated outside and a peppermint chocolate kiss at the center.
I like how the peppermint cuts through the cocoa without taking over. The dough is easy to portion, and rolling each ball in sugar gives the finished cookies a light, sparkly coating that makes the cracks stand out.
Press the kisses into the cookies while they’re still hot, then let everything settle on the baking sheet before moving them. You’ll get a soft chocolate base, a neat peppermint center, and just enough crunch from the sugar around the edges.
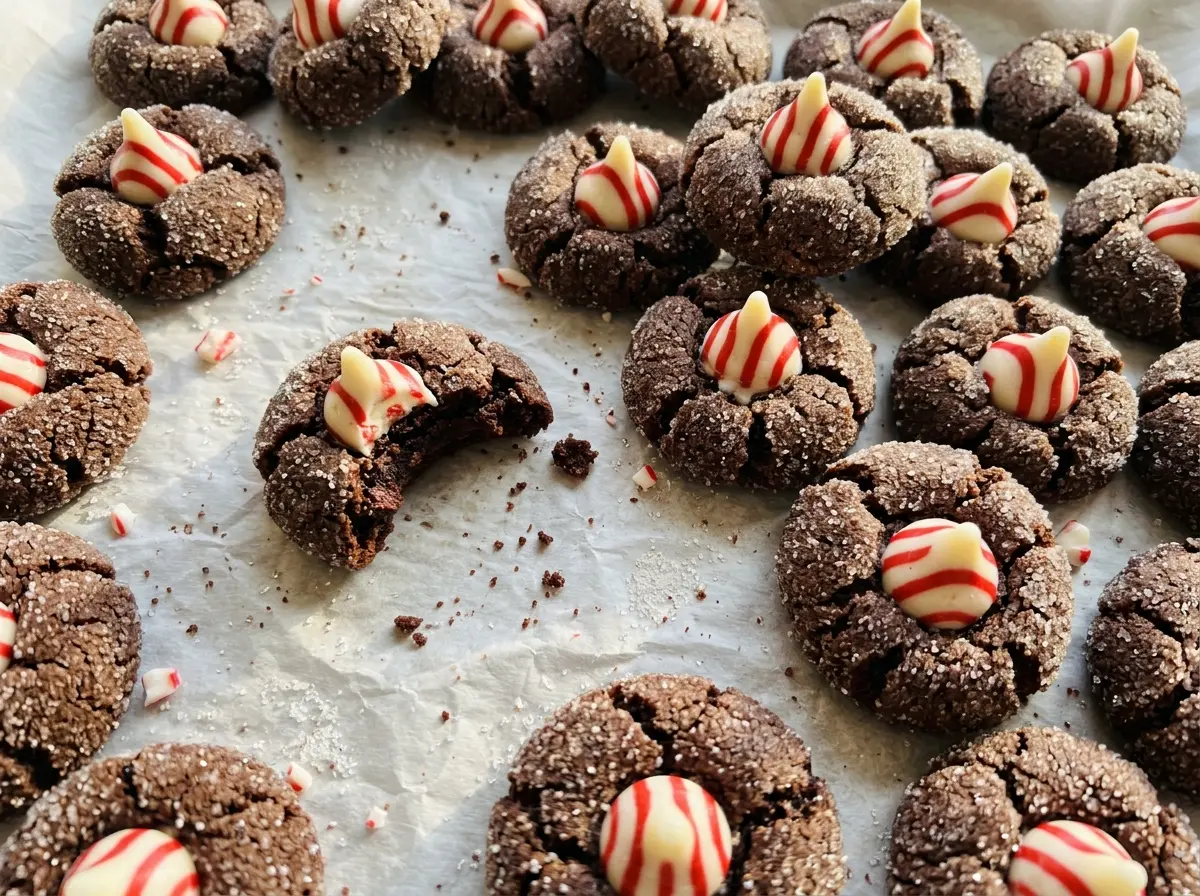
Kitchen Note
Let the baking sheet cool all the way before you load the second batch. A warm pan starts softening the dough balls before they bake, which can change how they spread.
Save these Chocolate Peppermint Blossoms for soft cocoa centers, sugar-coated edges, and a peppermint kiss in every cookie.
Why These Cocoa Cookies Should Come Out Before They Look Fully Baked
Chocolate dough doesn’t give you the same color cues as a pale sugar cookie. You can’t wait for golden edges to tell you the bottoms are done, and giving the tops time to form deep, wide cracks can leave the centers dry. Watch for the surface to look set and just begin to crack; that small change is the useful signal here.
The 8-to-10-minute window gives you room to respond to your oven, but the visual cue matters more than chasing the end of the range. Pull the cookies when those first cracks appear, then let them sit on the hot sheet for 5 minutes. They’ll firm enough to move to a rack without losing their tender middle. If the tops still look wet at 8 minutes, give them a little longer and check again rather than waiting for a dramatic crack pattern.
These cookies also get a chocolate kiss while the base is hot. That timing is part of the blossom shape: the warm cookie gives way around the candy, so you can press it into the center without baking the peppermint chocolate in the oven.
What the Cocoa, Sugar, and Peppermint Kiss Each Bring

- Unsweetened cocoa powder — This is the main chocolate flavor, so use cocoa you enjoy tasting straight from the tin. A standard, affordable unsweetened cocoa works well; sweetened cocoa drink mix isn’t a like-for-like swap because it includes other ingredients and sugar.
- Granulated sugar — The sugar is divided between creaming with the butter and coating the dough balls. Plain granulated sugar is the right choice for both jobs; specialty sugars won’t coat the cookies in quite the same fine, even layer.
- Unsalted butter — Butter brings richness and helps the dough cream smoothly with the sugar. A basic supermarket butter is fine here, and softened butter is important for the light, fluffy mixture. Melted butter won’t give you that same starting texture.
- Large egg and vanilla — The egg holds the dough together, while vanilla rounds out the cocoa. Use a large egg for the intended balance; a smaller egg can leave the dough drier and harder to bring together.
- All-purpose flour — It gives these cookies enough structure to hold a peppermint kiss. Bread flour would make the dough tougher, so stick with all-purpose for the soft texture.
- Peppermint-flavored chocolate kisses — The candy provides the minty center and the blossom’s familiar shape. Unwrap the kisses before baking so they’re ready to press into the cookies as soon as the sheet comes out.
From Fluffy Butter to Peppermint-Centered Cookies
Cream the Butter and Sugar
Beat the softened butter with 3/4 cup of the granulated sugar on medium speed until the mixture looks light and fluffy, about 2 minutes. Scrape down the bowl if you see butter clinging to the sides rather than blending in. Beat in the egg and vanilla until combined. If the mixture looks a little uneven at first, keep mixing just until the egg is incorporated.
Bring the Cocoa Dough Together
Whisk the flour, cocoa powder, baking soda, and salt in a separate bowl so the cocoa is distributed before it hits the butter mixture. Add the dry ingredients and mix on low just until no dry streaks remain. Stop there; mixing longer can make the cookies tougher. The dough should look evenly chocolatey, with no pockets of flour at the bottom of the bowl.
Portion, Coat, and Space the Dough
Shape the dough into 36 balls about 1 inch wide, then roll each one in the remaining 1/4 cup of sugar. Line an 18×13-inch rimmed baking sheet with parchment and arrange 18 balls on it, leaving 2 inches between them. Keep the balls close in size so they bake at the same pace. The remaining dough waits for the second round.
Bake, Press, and Cool
Bake at 350°F for 8–10 minutes, until the tops look set and are just beginning to crack. Press one peppermint kiss into the center of each cookie immediately after the pan comes out of the oven. Let the cookies cool on the baking sheet for 5 minutes before transferring them to a wire rack. Once the baking sheet is completely cool, bake the remaining dough for 8–10 minutes, add the kisses, and cool those cookies the same way.
Easy Ways to Change the Chocolate and Peppermint
Make Them Chocolate-Only Blossoms
Replace the peppermint-flavored kisses with the same number of regular chocolate kisses. You’ll keep the chocolate center and blossom shape, but lose the mint, which lets the cocoa flavor come through more clearly.
Try White Chocolate Peppermint Centers
Use white chocolate peppermint kisses in place of the regular peppermint chocolate ones. The mint stays, while the sweeter white chocolate gives each cookie a brighter contrast against the cocoa base.
Make a Gluten-Free Batch
Replace the all-purpose flour with a cup-for-cup gluten-free baking flour blend made for cookies and containing xanthan gum. The dough may feel a little more delicate, so shape it gently; the chocolate and peppermint flavors stay the same.
Storage and Reheating
- Refrigerator: These don’t need refrigeration. Keep them in an airtight container at room temperature for up to 4 days; refrigerating can make the cookies firm.
- Freezer: Freeze fully cooled cookies in an airtight container for up to 2 months. Let them thaw at room temperature before serving.
- Reheating: They’re best at room temperature, so skip reheating. Microwaving can soften or melt the peppermint kiss before the cookie warms evenly.
Questions That Come Up While Baking These Blossoms
Chocolate Peppermint Blossoms
Ingredients
Equipment
Method
- Preheat the oven to 350°F.
- Line one 18x13-inch rimmed baking sheet with parchment paper.
- In a large bowl, beat the butter and 3/4 cup sugar with an electric mixer on medium speed until light and fluffy, about 2 minutes.
- Beat in the egg and vanilla until combined.
- In a separate bowl, whisk together the flour, cocoa powder, baking soda, and salt.
- Add the flour mixture to the butter mixture and mix on low just until no dry streaks remain.
- Shape the dough into 36 balls about 1 inch wide.
- Roll the balls in the remaining 1/4 cup sugar.
- Arrange 18 balls 2 inches apart on the prepared baking sheet.
- Bake for 8–10 minutes, until the tops look set and are just beginning to crack.
- Immediately press one peppermint kiss into the center of each cookie.
- Let the cookies cool on the baking sheet for 5 minutes.
- Transfer the cookies to a wire rack.
- Let the baking sheet cool completely before baking the remaining dough.
- Bake the remaining dough for 8–10 minutes.
- Press the kisses into the centers of the cookies.
- Cool the cookies the same way.


