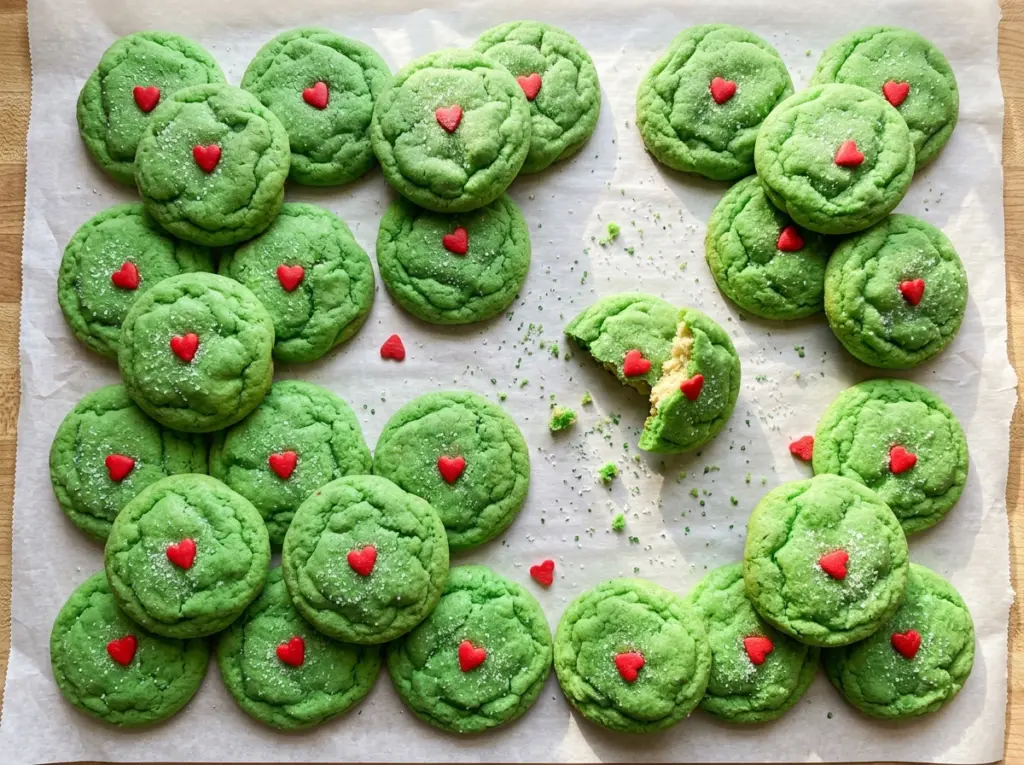
A sugar-cookie edge can go from pale to golden before you’ve had time to check the second tray. For these Grinch Sugar Cookies, I watch for tops that look set and edges that are just barely golden; that keeps the centers tender instead of dry. The green dough and little red heart make a simple cutout feel instantly recognizable, and the batch makes 24 cookies.
I roll the dough between parchment so it doesn’t need extra flour, then chill it before cutting. That combination keeps the dough manageable and helps the cookies hold their shape in the oven. A small dab of thick icing is all it takes to secure each heart, leaving the green cookie visible around the decoration.
Kitchen Note
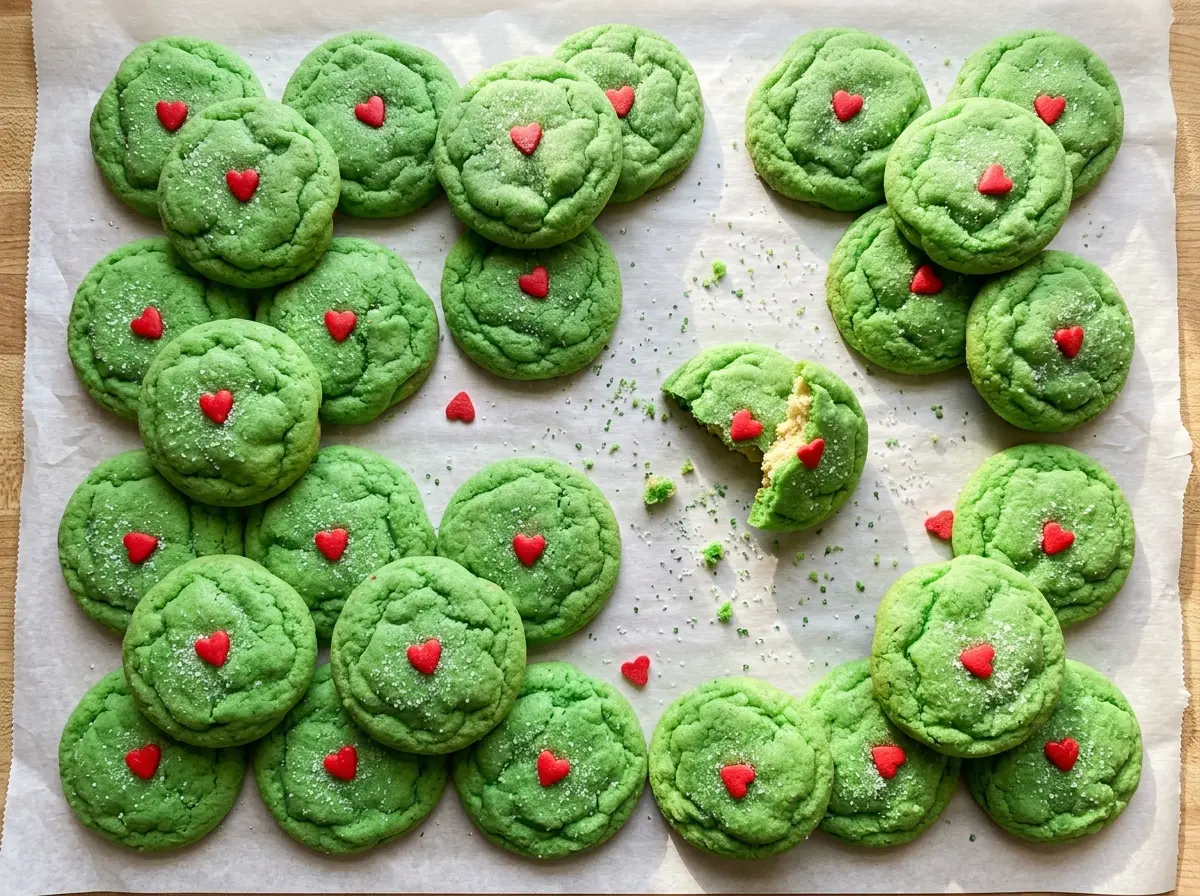
The icing should be thick enough to stay in a small dab instead of running across the cookie. Add the heart while that dab is still wet, then leave the cookies alone until the icing sets.
Save these Grinch Sugar Cookies for crisp green cutouts finished with a bright red heart.
Why Chilled Dough Matters More Than Extra Flour for These Cutouts
Cutout dough that’s too soft can stick, stretch, and lose its clean edges as you move it to the baking sheet. Chilling the dough firms the butter, so the rolled sheet is easier to cut and the shapes are less likely to slump in the oven. It’s a more reliable fix than working extra flour into the dough, which can make the cookies tougher and less tender.
Rolling between parchment helps for the same reason: the dough can be rolled without dusting the counter with flour. Flattening it into two disks before chilling also makes it easier to roll evenly than trying to flatten one big lump. Once you’ve cut the first tray, keep the second sheet cold while the first bakes. The dough stays firmer, and your cutouts are more likely to keep their edges and thickness from tray to tray.
What Gives These Cookies Their Color, Shape, and Little Heart

- All-purpose flour and baking powder — Flour gives the cutouts their structure, while baking powder adds a little lift. All-purpose flour is the dependable choice here; a cup-for-cup gluten-free baking blend formulated for cookies is the closest swap, though the dough may be more delicate.
- Butter and granulated sugar — Beating softened butter with sugar until pale and fluffy builds the base of the dough and helps the cookies bake up tender. Unsalted butter lets the measured salt stay in balance, but a standard grocery-store brand works well.
- Green gel food coloring — Gel gives the dough a vivid color without adding much liquid. Liquid coloring is less concentrated, so it may take more to reach the same green and can loosen the dough.
- Vanilla extract — Vanilla rounds out the buttery sweetness. A good everyday extract is enough; almond extract gives a distinctly different, nuttier note if you want to change the flavor.
- Powdered sugar and milk — Powdered sugar makes a smooth, opaque icing that can hold a sprinkle in place. The milk loosens it; an unsweetened plant-based milk can replace dairy milk in the same amount.
- Red heart-shaped sprinkles — These provide the signature red accent and press neatly into a small dab of icing. Choose a flat-backed heart if you have one; it sits securely without needing a larger patch of icing.
From Green Dough to Neat, Heart-Topped Cutouts
Cream the Butter, Sugar, and Color
Whisk the flour, baking powder, and salt in a medium bowl. In a large bowl, beat the softened butter and granulated sugar with an electric mixer on medium speed until pale and fluffy, about 2 minutes. Beat in the egg, vanilla, and green gel coloring until smooth. Add the flour mixture on low speed and stop as soon as a dough forms; mixing longer than needed can make the cookies firm.
Chill the Dough in Flat Disks
Divide the dough in half and flatten each portion into a disk before wrapping it. Refrigerate the disks for 1 hour so the butter firms and the dough is easier to roll. A flat disk chills evenly and doesn’t leave you wrestling with a cold ball of dough. Keep each half wrapped until you’re ready to work with it.
Roll Evenly and Bake One Sheet at a Time
Heat the oven to 350°F and line two 18×13-inch baking sheets with parchment paper. Roll each disk between sheets of parchment to 1/4 inch thick, cut 2 1/2-inch cookies, and arrange them about 2 inches apart. Keep the second sheet refrigerated while the first bakes. Bake one sheet at a time for 9–11 minutes, until the tops look set and the edges are just barely golden.
Cool Completely Before Adding the Hearts
Leave each batch on its baking sheet for 5 minutes, then transfer the cookies to a wire rack to cool completely. Stir the powdered sugar and milk together in a small bowl until the icing is smooth and thick. Put a small dab on each cooled cookie and press a red heart sprinkle into it. The decoration will shift if you move the cookies before the icing sets, so let it firm up before serving.
Easy Changes for Different Diets and Cookie Boxes
Make Them Dairy-Free
Use block-style vegan baking butter in place of the unsalted butter, and use unsweetened plant-based milk in the icing. The cookies will have a slightly different buttery flavor, but the dough still works as a cutout; avoid soft tub-style spreads, which can make it harder to get a firm dough.
Give the Cookies a Peppermint Note
Replace the vanilla extract with 1/2 teaspoon peppermint extract. Peppermint is more assertive than vanilla, so the smaller amount gives the cookies a clear minty aroma without overwhelming the buttery dough.
Use a Cup-for-Cup Gluten-Free Flour
Replace the all-purpose flour with a cup-for-cup gluten-free baking blend that contains xanthan gum. The dough can be more fragile than the wheat version, so roll it between parchment and handle the cutouts gently. The flavor stays mild, though the texture may be a little less tender.
Storage and Reheating
- Refrigerator: Store the decorated cookies in an airtight container for up to 5 days. The cookies may firm up slightly, and condensation can make the icing tacky.
- Freezer: Freeze the undecorated cookies in an airtight container for up to 2 months, with parchment between layers. Thaw at room temperature, then add the icing and hearts.
- Reheating: These cookies are best at room temperature and don’t need reheating. Heat can soften the icing and loosen the heart decoration.
Questions That Come Up While Making Grinch Sugar Cookies
Grinch Sugar Cookies
Ingredients
Equipment
Method
- Whisk the flour, baking powder, and salt together in a medium bowl.
- Beat the butter and granulated sugar with an electric mixer on medium speed until pale and fluffy, about 2 minutes.
- Beat in the egg, vanilla, and green food coloring until smooth.
- Mix in the flour mixture on low speed just until a dough forms.
- Divide the dough in half, flatten each half into a disk, wrap, and refrigerate for 1 hour.
- Heat the oven to 350°F and line two 18x13-inch baking sheets with parchment paper.
- Roll each dough disk between sheets of parchment to 1/4 inch thick.
- Cut out 2 1/2-inch cookies and arrange them about 2 inches apart on the baking sheets; keep the second sheet refrigerated while the first bakes.
- Bake one sheet at a time for 9–11 minutes, until the tops look set and the edges are just barely golden.
- Let each batch cool on the pan for 5 minutes, then transfer the cookies to a wire rack to cool completely.
- Stir the powdered sugar and milk together in a small bowl until smooth and thick.
- Put a small dab of icing on each cooled cookie and press a red heart sprinkle into the icing.
- Let the icing set before serving.


