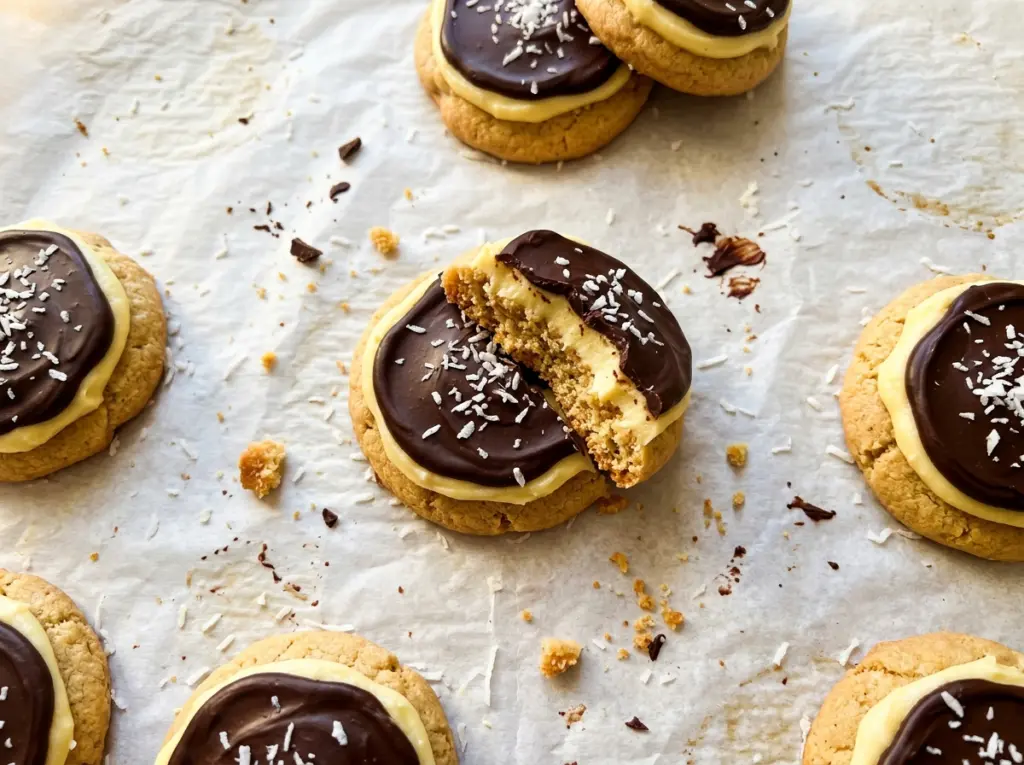
The first one I assembled looked more like a little layer cake than a cookie: a tender vanilla base, a stripe of fluffy custard filling, and a thin chocolate top scattered with coconut and almonds. That’s the fun of these Nanaimo Bar Sugar Cookies—they borrow the layered feel of Nanaimo bars and put it on a cookie you can pick up.
The base is a soft sugar cookie, not a crumb crust, so it’s sturdy enough to hold the filling without losing its tender bite. I chill the dough before baking, then give the filling time to firm up before the chocolate goes on. Those pauses keep the layers neat and make the finished cookies easier to handle.
Use custard powder for a classic custardy note, or dry instant vanilla pudding mix for a more familiar vanilla flavor. Either way, the smooth filling, semisweet chocolate, coconut, and almonds bring all the signature Nanaimo-style layers together in one buttery cookie.
Kitchen Note
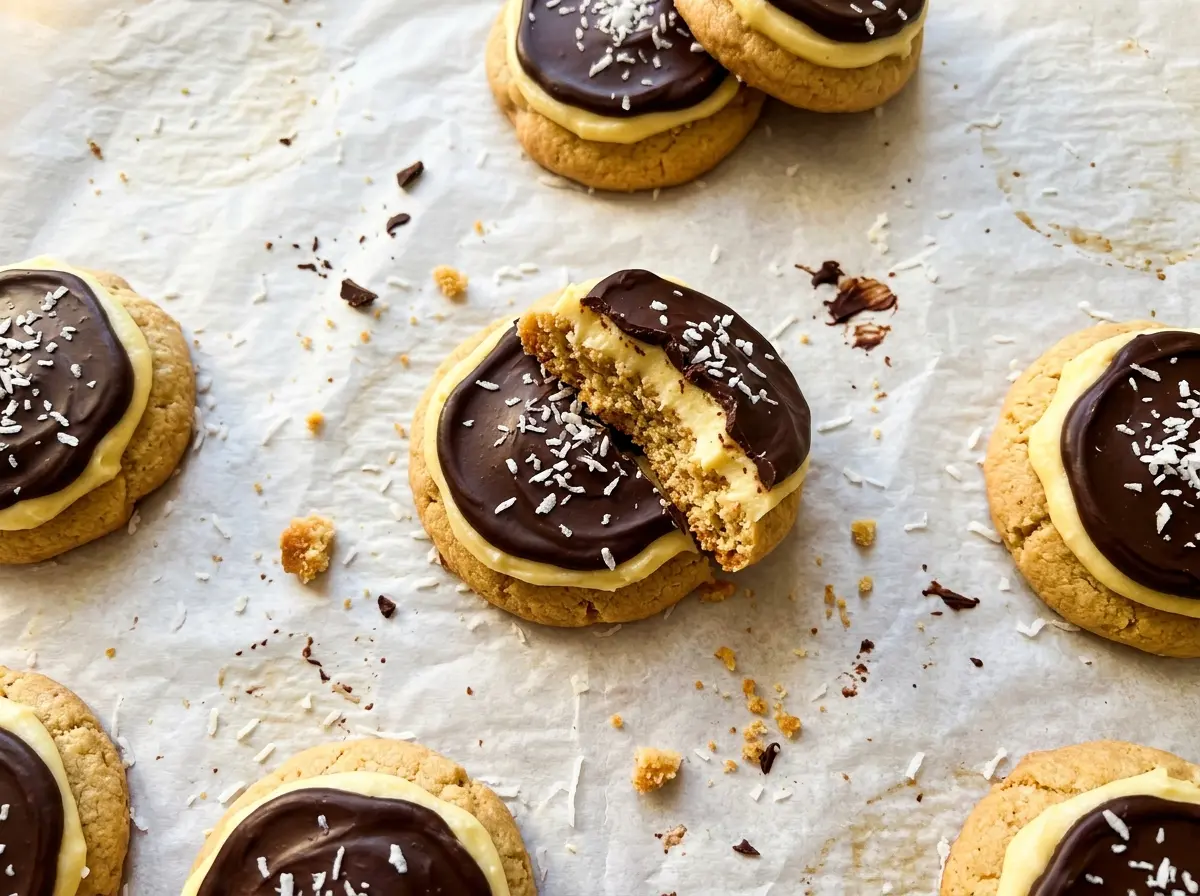
Don’t stack these while the chocolate cap is still tacky. I wait until it’s fully set before moving the cookies into a container, so the tops don’t pick up fingerprints or lose their coconut and almond topping.
Save these Nanaimo Bar Sugar Cookies for a bake when you want soft vanilla cookies with custard filling and a chocolate-coconut-almond finish.
Why These Nanaimo Bars Start With a Sugar Cookie, Not a Crumb Crust
A classic Nanaimo bar is built in layers, and this cookie version keeps that idea while changing the foundation. The sugar-cookie base bakes into individual portions, so you get a buttery, tender bite beneath the custard filling instead of a pressed crumb layer. It’s a different texture, but the contrast still matters: a soft cookie, a creamy middle, and a thin chocolate cap.
That difference also changes how you assemble them. The cookies need to cool completely before the filling goes on, or the butter-based layer will soften against the warm surface. Then the filling needs a short chill before you add the chocolate. Working in that order gives each layer a chance to hold its shape, rather than blending into the one below it.
The dough’s brief refrigerator rest is useful for more than convenience. Chilled dough is easier to portion into even balls, and the cookies bake into a better platform for their toppings. Keep the portions similar in size so the two baking sheets finish at about the same time.
Custard Powder, Butter, and the Chocolate That Finish Each Layer

- Custard powder or dry instant vanilla pudding mix — Either one gives the butter-and-sugar filling its characteristic custardy or vanilla note. Use the dry mix, not prepared pudding; prepared pudding adds moisture and won’t produce the same fluffy filling.
- Unsalted butter — It’s divided between the cookie dough and filling, so softened butter makes both mixtures easier to beat evenly. A standard grocery-store butter works well here; the important detail is that it’s softened, not melted.
- Semisweet chocolate — Chopped chocolate melts smoothly, while semisweet chips are a convenient option and are included as an alternative. The chocolate’s sweetness balances the filling, so semisweet is a good fit.
- Refined coconut oil — It helps the melted chocolate spread into a smooth layer. Refined oil keeps the topping from taking on a strong coconut aroma, leaving the shredded coconut to provide that flavor.
- Sweetened shredded coconut and sliced almonds — These make the topping recognizable and add a little chew and crunch. Use the shredded style rather than large coconut flakes so it sits neatly on the chocolate.
Building the Cookie, Filling, and Chocolate Layers Without Rushing
Cream the Butter and Chill the Dough
Heat the oven to 350°F and line two baking sheets with parchment. Beat the cookie portion of softened butter with the granulated sugar until light and fluffy, about 2 minutes, then beat in the egg and vanilla. Whisk the flour, baking powder, and salt separately before mixing them into the butter mixture just until no dry streaks remain; extra mixing can make the cookies firmer. Cover the dough and refrigerate it for 30 minutes.
Bake Until the Centers Look Just Dry
Scoop the dough into 24 balls, about 1 1/2 tablespoons each, and arrange 12 on each prepared sheet with about 2 inches between them. Bake both sheets for 10–12 minutes, swapping and rotating them halfway through so the cookies bake evenly. Look for set edges and centers that have just lost their wet appearance; don’t wait for deep browning. Cool the cookies on the baking sheets for 5 minutes, then move them to a wire rack and let them cool completely.
Beat and Chill the Custard Filling
Beat the remaining softened butter with the powdered sugar, custard powder or dry instant vanilla pudding mix, and heavy cream until the filling is smooth and fluffy. If you see small butter lumps, keep beating until the mixture comes together rather than spreading it while uneven. Once the cookies are completely cool, spread about 1 tablespoon of filling over each one. Refrigerate the cookies for 20 minutes, until the filling feels firm.
Cap Each Cookie With Chocolate
Put the semisweet chocolate and refined coconut oil in a microwave-safe bowl. Heat in 20-second bursts, stirring between each one, until the mixture is smooth; longer blasts can scorch chocolate before it looks fully melted. Spread the chocolate over the firm filling, then sprinkle on the shredded coconut and sliced almonds. Refrigerate for 15–20 minutes, until the chocolate is set.
Three Simple Ways to Adapt the Topping and Filling
A More Vanilla-Forward Filling
Choose dry instant vanilla pudding mix instead of custard powder. The filling leans more distinctly toward vanilla, while keeping the same fluffy texture and layer-by-layer assembly.
An Almond-Free Topping
Leave off the sliced almonds and keep the shredded coconut. You’ll still get a coconut finish, but without the almond crunch; this is an almond-free adjustment, not a guarantee for anyone with a broader nut allergy.
A Gluten-Free Cookie Base
Replace the all-purpose flour with a cup-for-cup gluten-free baking blend formulated for cookies. The finished base may be a little more delicate, so let the cookies cool fully before adding the filling.
Storage and Reheating
- Refrigerator: Keep the cookies in an airtight container for up to 5 days. The cookie base softens slightly as it sits with the filling.
- Freezer: Freeze the set cookies in a single layer until firm, then transfer them to an airtight container with parchment between layers. They keep well for up to 2 months; thaw in the refrigerator.
- Reheating: These don’t need reheating. Let a chilled cookie sit at room temperature briefly for a softer bite, and skip the microwave, which can soften the chocolate unevenly.
Questions About Nanaimo Bar Sugar Cookies
Nanaimo Bar Sugar Cookies
Ingredients
Equipment
Method
- Heat the oven to 350°F.
- Line two baking sheets with parchment paper.
- In a large bowl, beat 1 cup of the softened butter with the granulated sugar until light and fluffy, about 2 minutes.
- Beat in the egg and vanilla.
- In a separate bowl, whisk together the flour, baking powder, and salt.
- Mix the dry ingredients into the butter mixture just until no dry streaks remain.
- Cover the dough and refrigerate it for 30 minutes.
- Scoop the dough into 24 balls, about 1 1/2 tablespoons each.
- Arrange 12 balls on each baking sheet, spaced about 2 inches apart.
- Bake both sheets for 10–12 minutes, swapping and rotating them halfway through, until the edges are set and the centers look just dry.
- Cool the cookies on the baking sheets for 5 minutes.
- Transfer the cookies to a wire rack and cool completely.
- Beat the remaining 1/2 cup softened butter with the powdered sugar, custard powder or pudding mix, and heavy cream until smooth and fluffy.
- Spread about 1 tablespoon of filling over each cooled cookie.
- Refrigerate the cookies for 20 minutes, until the filling is firm.
- Melt the chocolate and coconut oil together in a microwave-safe bowl in 20-second bursts, stirring between each, until smooth.
- Spread the chocolate over the filling on each cookie.
- Sprinkle the cookies with the shredded coconut and sliced almonds.
- Refrigerate for 15–20 minutes, until the chocolate is set.


