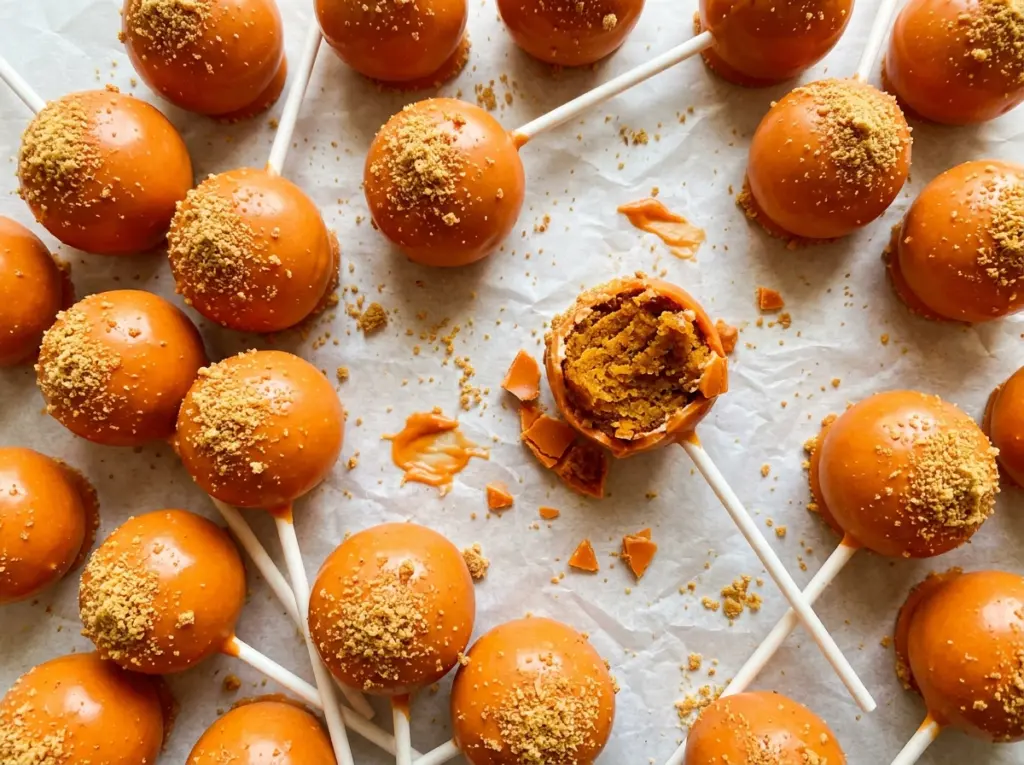
When a toothpick comes out of pumpkin cake with a few moist crumbs, it’s ready to become something else entirely. I bake the cake in a 9×13-inch pan, let it cool completely, then crumble it with softened cream cheese until the mixture holds together when squeezed. That’s the point where these pumpkin pie cake pops stop being a pile of crumbs and start taking shape.
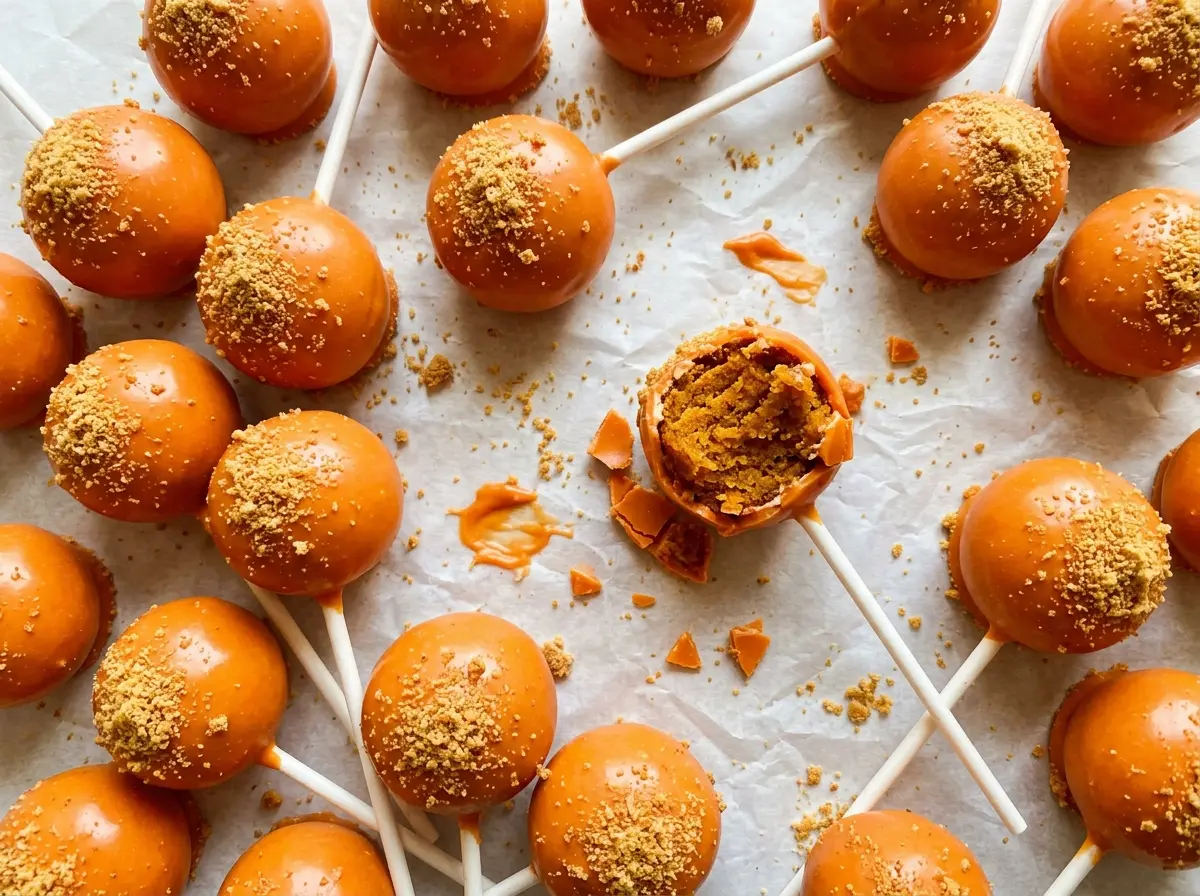
The pumpkin and warm spices make the centers tender, while orange candy coating and a little graham cracker crunch give each pop its pie-inspired finish. I keep the cake fully cool before mixing, because warm crumbs soften the cream cheese and make the mixture harder to roll neatly. Once the balls are firm from a short chill, the sticks and coating are much easier to handle, and each pop gets a clean, crisp shell.
Kitchen Note
Dip each stick about 1/2 inch into the coating before pushing it halfway into a cake ball. That little coating collar sets around the stick during the 10-minute chill and helps keep the pop anchored when you dip it.
Save these pumpkin pie cake pops for a dessert table that needs a hand-held treat with spiced cake, orange coating, and a graham cracker finish.
Why Cake Pops Need Crumbs That Hold Together, Not a Frosting-Soft Center
These pops get their structure from the cake itself and a modest amount of softened cream cheese. The finished mixture should feel moist and cohesive, but it shouldn’t turn into a smooth paste. If you add too much binder or keep mixing past the point where the crumbs hold together, the balls can feel heavy and soft instead of having a tender cake center.
That’s why I check the texture with my fingers before rolling the whole batch. Squeeze a small pinch of the mixture: it should stay in one piece when you open your hand. If it falls apart, keep mixing the cream cheese through the crumbs rather than adding extra ingredients. Roll the balls evenly, too; a consistent size chills at the same rate and is easier to coat without dragging through the candy shell.
The pumpkin cake itself also needs to be fully baked before it becomes crumbs. A toothpick in the center should come out clean or with a few moist crumbs, not wet batter. This gives you a cake that crumbles readily while still holding enough moisture to come together with the cream cheese.
What Gives These Pops Their Spiced Center and Crisp Graham Finish

- Canned pumpkin puree — Choose plain puree, not pumpkin pie filling, which is already sweetened and spiced. The puree brings moisture and pumpkin flavor to the cake; homemade puree can vary in water content, so canned gives this batter a more dependable starting point.
- The ground spices — Cinnamon leads, with ginger, nutmeg, and cloves filling out the pie-like aroma. Fresh, fragrant spices make a noticeable difference here, especially if yours have been open for a long time. Keep the blend together for the intended warm flavor rather than replacing it with pumpkin pie spice, which may contain a different spice balance.
- Vegetable oil — Oil keeps the pumpkin cake tender and moist after baking, which matters once it’s crumbled. Use a neutral vegetable oil; a strongly flavored oil would compete with the spices.
- Softened cream cheese — It binds the crumbs while adding a gentle tang that keeps the center from tasting like plain cake. Let it soften enough to mix evenly; cold chunks are difficult to blend through the crumbs without overworking them.
- Orange candy melts and shortening — Candy melts form the firm outer shell, and the shortening helps the melted coating flow more smoothly for dipping. Graham cracker crumbs add the final crunchy edge; finely crushed crumbs cling neatly to the wet coating.
From Tender Pumpkin Cake to a Coating That Sets Cleanly
Mix and bake a cake with moist, even crumbs
Heat the oven to 350°F and coat a 9×13-inch baking pan with nonstick cooking spray. Whisk the dry ingredients together in a medium bowl, then whisk the sugars, pumpkin, oil, eggs, and vanilla in a large bowl until smooth. Stir in the flour mixture just until no dry streaks remain; stopping there keeps the cake tender. Spread the batter in the pan and bake for 25 to 30 minutes, checking the center with a toothpick for a clean result or a few moist crumbs.
Cool completely before crumbling
Leave the cake in its pan until it has cooled completely, about 1 hour. If the center is still warm, the cake will crumble into damp clumps and can soften the cream cheese when they meet. Break the cooled cake into a large bowl, add the softened cream cheese, and mix until the crumbs hold together when squeezed. You want a cohesive mixture that still looks like fine cake crumbs, not a dense, smooth dough.
Roll and chill firm cake balls
Divide the mixture into 24 equal portions and roll each one into a ball, smoothing any loose cracks with your hands. Arrange them on a parchment-lined rimmed baking sheet and refrigerate for 30 minutes, until firm. If the balls are still soft when you pick one up, give them more time to chill before moving on; firm balls are less likely to shift on the sticks. Even sizing also makes the coating step more predictable.
Melt, anchor, dip, and finish with crumbs
Put the orange candy melts and vegetable shortening in a tall microwave-safe cup. Microwave at 50% power in 30-second intervals, stirring each time, until the coating is smooth; short bursts help prevent scorching. Dip about 1/2 inch of each stick in the coating, insert it halfway into a ball, and refrigerate the pops for 10 minutes to set the sticks. Dip each pop, let excess coating drip back into the cup, then press its lower edge into the graham cracker crumbs while the coating is wet; stand the pops upright in a cake-pop stand or a clean cardboard box with small holes until set, about 15 minutes.
Easy Changes That Still Keep These Pops Firm on the Stick
Make a gluten-free batch
Replace the all-purpose flour with a cup-for-cup gluten-free baking blend that includes xanthan gum, and use gluten-free graham cracker crumbs. The cake may have a slightly more delicate or grainy crumb, so let it cool fully and check that the mixture holds together before rolling.
Trade the orange shell for chocolate
Use chocolate candy melts in place of the orange ones and keep the vegetable shortening to help the coating dip smoothly. You’ll get a darker, cocoa-forward shell that pairs well with the pumpkin spices, though the pops lose their bright orange pumpkin-pie look.
Give the crumb edge a ginger snap
Use finely crushed gingersnaps instead of graham cracker crumbs, pressing the lower edge of each dipped pop into the crumbs before the coating sets. The topping brings a sharper ginger note and a slightly darker crunch without changing the pumpkin cake center.
Storage and Serving
- Refrigerator: Store finished pops in an airtight container for up to 4 days. The chilled cake center stays moist, while the candy shell may lose a little of its crisp snap.
- Freezer: For best results, freeze the cooled, uncrumbled cake rather than the finished pops. Wrap it tightly and freeze for up to 2 months; thaw it in the refrigerator before crumbling and mixing.
- Serving: Keep the pops chilled until you’re ready to serve. Don’t leave them at room temperature for more than 2 hours because the centers contain cream cheese.
Answers to the Pumpkin Cake Pop Problems That Come Up Mid-Batch
Pumpkin Pie Cake Pops
Ingredients
Equipment
Method
- Heat the oven to 350°F and coat a 9x13-inch baking pan with nonstick cooking spray.
- Whisk the flour, baking powder, baking soda, cinnamon, ginger, nutmeg, cloves, and salt in a medium bowl.
- Whisk the granulated sugar, brown sugar, pumpkin, oil, eggs, and vanilla in a large bowl until smooth.
- Stir the flour mixture into the pumpkin mixture just until no dry streaks remain.
- Spread the batter in the prepared pan and bake for 25 to 30 minutes, until a toothpick inserted in the center comes out clean or with a few moist crumbs.
- Cool the cake completely in the pan, about 1 hour.
- Crumble the cooled cake into a large bowl.
- Add the cream cheese and mix until the crumbs hold together when squeezed.
- Roll the mixture into 24 equal balls and arrange them on a parchment-lined rimmed baking sheet.
- Refrigerate the balls for 30 minutes, until firm.
- Put the candy melts and shortening in a tall microwave-safe cup.
- Microwave at 50% power in 30-second intervals, stirring each time, until smooth.
- Dip 1/2 inch of each lollipop stick into the melted coating and insert it halfway into a cake ball.
- Refrigerate the pops for 10 minutes to set the sticks.
- Dip each pop into the coating and let the excess drip back into the cup.
- Press the lower edge into the graham cracker crumbs while the coating is still wet.
- Stand the pops upright in a cake-pop stand or a clean cardboard box with small holes punched in it until the coating is set, about 15 minutes.


